Tuesday, May 13, 2014

Block Printing

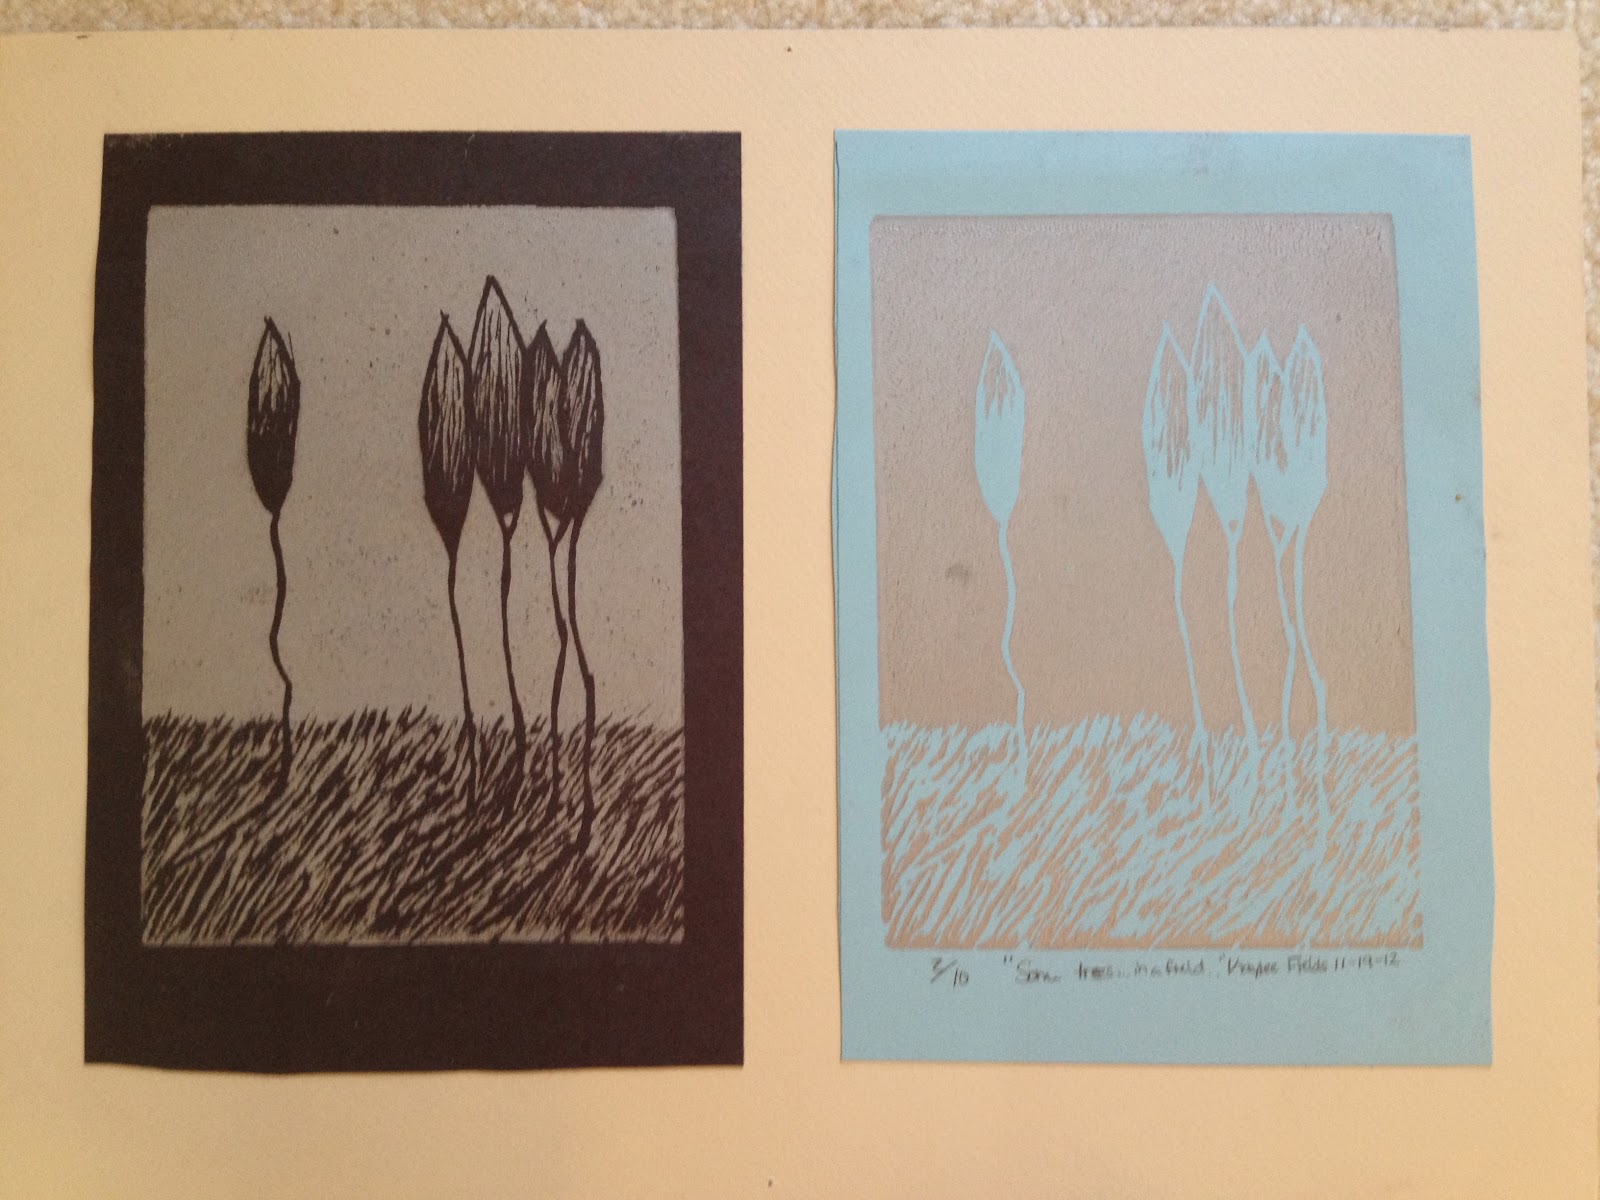
This was one of my favorites from the art class I took. You can continue to use the stamp even after you have made a ton of copies. I think this project is pretty simple so hopefully you find it easy.

Materials:

  • Any chosen image (the simpler the better though)
  • A slab of rubber for the stamp part
  • Tools to cut the rubber
  • Ink for the prints
  • Paper to print on
  • Brushes
Steps:
  1. Draw your image on paper
  2. Transfer that image onto the block
  3. Carve the image into the block
  4. Thinly and evenly coat the block with ink
  5. Press onto paper
  6. Keep trying until you get a perfect print, or experiment with different ink colors and paper
   Like I said, I enjoyed this project a lot.. so much that I made over 30 prints. I have a large stack of bad results from either applying too much or too little ink. Once I learned the right amount, I got some nice-looking prints. I plan to frame some and put them up in my room soon. Don't get discouraged if the prints don't turn out nice at first, it takes a lot of practice to get the ink amount right. Good luck with this project!

Black and White Drawing

    This drawing was a project I did in my art class. I had some difficulties with this piece because I couldn't decide on what I wanted to draw and doing the eyes was challenging. This project takes a long time because it is more detailed than the other things I have done.
Materials:
  • Black paper
  • Any image you choose
  • White chalk
  • Black charcoal/chalk 
  • Patience (each strand of fur needs to be drawn separately)
Steps
  1. Choose your image
  2. Lightly draw an outline
  3. Begin the detailed drawing
  4. Shade or highlight 

   As you can see, my drawing ended up sort of smudgy, so be careful with the materials. I was pretty proud of this drawing when I first made it, but now I see all of these little imperfections. Maybe I just shouldn't look at it? But anyway, I hope your B&W drawing turns out well!

Make Your Own Book

  This project is from my art class last year as well. I loved doing this project because it allows you to be really creative and unique. You can make it into a journal or just a decoration for your room like I did.


Materials needed:

  • Cardboard (for the cover)
  • Thicker paper (for the pages)
  • Any decorative supplies you want 
  • Paint 
  • String to bind the book
Steps:
  1. Measure and cut the cardboard however big you want your book to be
  2. Design the pages you want to put inside the book. Here are examples of what mine look like:


  3. Line the cardboard and pages up and then punch holes into them so you can make the binding
  4. Use string, yarn, or some other material to bind the book together. If you make the string longer, it can double as the binding and a book mark
You could also make your own paper to put in the book. I chose to make my own paper because it was a requirement for the class, but you can do whatever you want. 

Monday, May 12, 2014

Negative Space Drawing

  I took an art class at my school last year and I am using some of the projects from that class in my blog. This negative space drawing was really fun and interesting.

Here is what you need:

  • An image from a magazine
  • Paper
  • Carbon paper (to copy image from magazine to paper)
  • Pencil
Steps:
  1. Pick whatever image you want from a magazine or print one out
  2. Tape the carbon paper on top of the regular paper
  3. Draw over the outer lines of the drawing
  4. Shade in the image on the normal paper
Make sure you don't draw the inner lines because if you do it won't really be negative. This is how my drawing turned out. You can choose a more difficult or easier picture to draw. Make the shading sort of taper off to get the negative effect. I hope you enjoy this artsy project!

Sunday, May 11, 2014

Paint Chip Calendar

 I usually don't use calendars, but after finding this idea, I decided to make one. I found this project at: https://whimseybox.com/projects/diy-paint-chip-calendar-white-board
I thought it would be interesting and easy to do, but it turned out to be more difficult. Here is how I made my dry-erase paint chip calendar:
   Items needed:

  •    42 paint chips of whatever colors you want
  • A picture frame (40x50 cm)
  • X-acto knife
  • Ruler
  • Glue
Steps:
  1. Cut all paint chips to be 4.6cm x 4.6 cm
  2. Arrange paint chips in rows of 7 on the white sheet of paper that fits your frame. (I used the back of the sheet that comes with the frame) I started the first and last rows about 7 cm from the top and bottom of the paper. Each paint chip had .5 cm in between but you can space them however you want.
  3. Glue onto the paper. (I used a hot glue gun)
  4. Place the paper back in the frame and then you have a reusable calendar
My results:
   Mine didn't turn out as good as the example that I made mine from. My spacing was a little off and I accidentally glued one of the chips crooked, but I still liked my results. My calendar is now hung up on the wall in my room and it helps me to be more organized. I hope you find this project useful too!

Monday, April 7, 2014

Success Vs. Failure

Success

      Success is when you reach your goal and are satisfied with the results. I believe I have been successful in my education so far. To become successful I worked hard in and out of school so I could get good grades.
Success is dependent on effort - Sophocles

Failure 

      Failure is not reaching your goal and then not trying again, just giving up completely. I have failed in cross country this past season. I decided early on that I would not be having a good season, so I sort of gave up on trying to improve. I really regret not pushing myself to the limit and trying to get better. 
There is no failure except in no longer trying - Elbert Hubbard

    Personally, I am motivated by the threat of failure. I try to avoid failing, and if I do, I am less motivated to reach success at whatever I am doing. This is not beneficial and I will try to be more motivated by my failures.
    So far in my Genius Hour project, I have not been successful at all. I have not made enough time for this project even though it is really fun to do. I have not posted nearly enough and I need to improve on that. Since this project is so fun, I forget about it because it competes for time against actual homework from school which is a higher priority to me. Hopefully I can use my time better to allow myself to work on this project. I think I will need to change my goal from actually doing crafts and art every week to just explaining how I did my past art projects. This will save me time, but still contribute to my project. At the end of this project, if I have truly given all of my time and effort into my blog, then I will classify it as a success. If, however, I waste time and don't get anything done, I will have failed.

Tuesday, March 4, 2014

Fancy Notebooks

         Do you have any ugly notebooks just waiting to be used? Well I do, so I decided to spice them up with washi tape (click here to learn about washi tape).

Here is what you need to begin:
  1. Washi Tape
  2. Ugly Notebook
  3. Scissors or X-acto knife
            After you have the materials, all you need to do is place the washi tape on the notebook in any design and fold excess washi tape over the edge. 

If you have holes in your notebook, just use an x-acto knife to cut the tape out of them. Just continue applying tape until the notebook is covered on both sides. 


Now you have your own, personalized notebook! 

Monday, January 13, 2014

VIA Survey of Character Strengths

    My psychology class took a survey today that determines our character strengths. If you want to see your character strengths you can take the test here: http://www.authentichappiness.sas.upenn.edu/default.aspx All you have to do is create an account and choose the VIA character strengths test.These are my results:

Here are your scores on the VIA Survey of Character Strengths. For how to interpret and use your scores, see the book Authentic Happiness. The ranking of the strengths reflects your overall ratings of yourself on the 24 strengths in the survey, how much of each strength you possess. Your top five, especially those marked as Signature Strengths, are the ones to pay attention to and find ways to use more often.

Test Results

Top Strength

Citizenship, teamwork, and loyalty
You excel as a member of a group. You are a loyal and dedicated teammate, you always do your share, and you work hard for the success of your group.

Second Strength

Creativity, ingenuity, and originality
Thinking of new ways to do things is a crucial part of who you are. You are never content with doing something the conventional way if a better way is possible.

 Third Strength

Love of learning
You love learning new things, whether in a class or on your own. You have always loved school, reading, and museums-anywhere and everywhere there is an opportunity to learn.

 Fourth Strength

Fairness, equity, and justice
Treating all people fairly is one of your abiding principles. You do not let your personal feelings bias your decisions about other people. You give everyone a chance.

 Fifth Strength

Judgment, critical thinking, and open-mindedness
Thinking things through and examining them from all sides are important aspects of who you are. You do not jump to conclusions, and you rely only on solid evidence to make your decisions. You are able to change your mind.